
How To: Custom Objects Sync with Hubspot
⚠️ You will require an Enterprise-level subscription with Hubspot to use this feature.
Ensure that you have connected the Hubspot integration prior to starting.
1. Create a Private App in Hubspot
Navigate to Settings in the top menu bar in Hubspot.
Find Integrations > Legacy apps in the left navigation bar.
Click Create.
Select Private.
Give the Private App a name, and click Scopes > + Add new scope.
Find and select "crm.schemas.custom.read" and "crm.schemas.custom.write", and hit Update.
Click Create app.
Refer to this guide from Hubspot's documentation for more information on creating a Private App.
2. Add the private app token to the Maple integration
Navigate to the private app you just created. Click into the Auth tab to find the "Access token". Copy this token, as you will need to paste it into Maple.
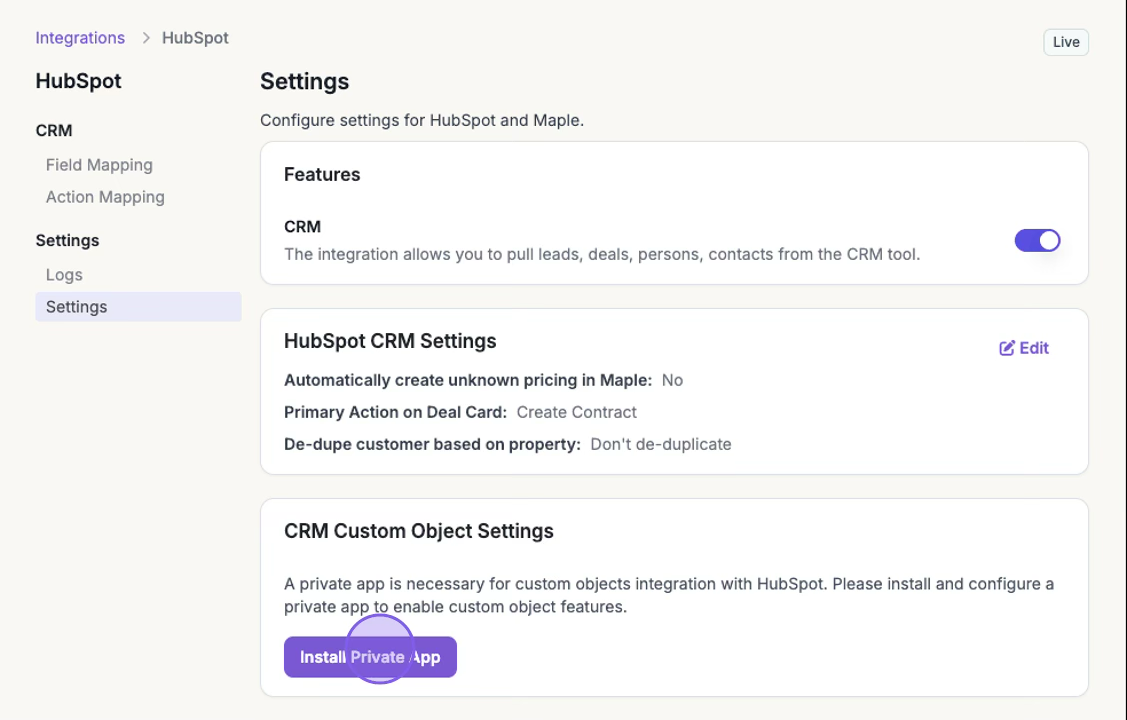
In Maple, locate the Integrations tab in the left navigation bar, and click Manage in the Hubspot card.
Click Install Private App and paste the Private App token. Click Install Private App.
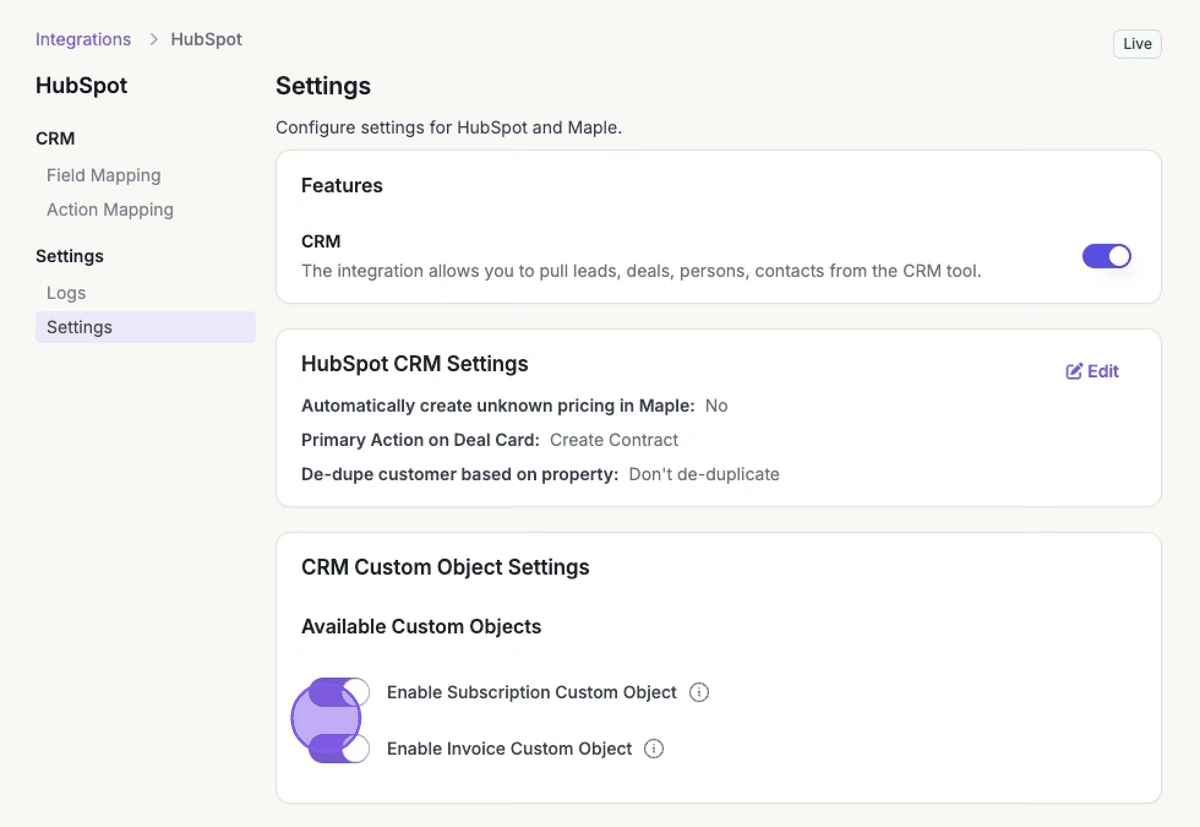
Once the private app has been installed, toggle on Enable Subscription Custom Object under Available Custom Objects.
3. Push Custom Objects into Hubspot
Under the Action Mapping tab, you can now send custom objects from Maple back into Hubspot.
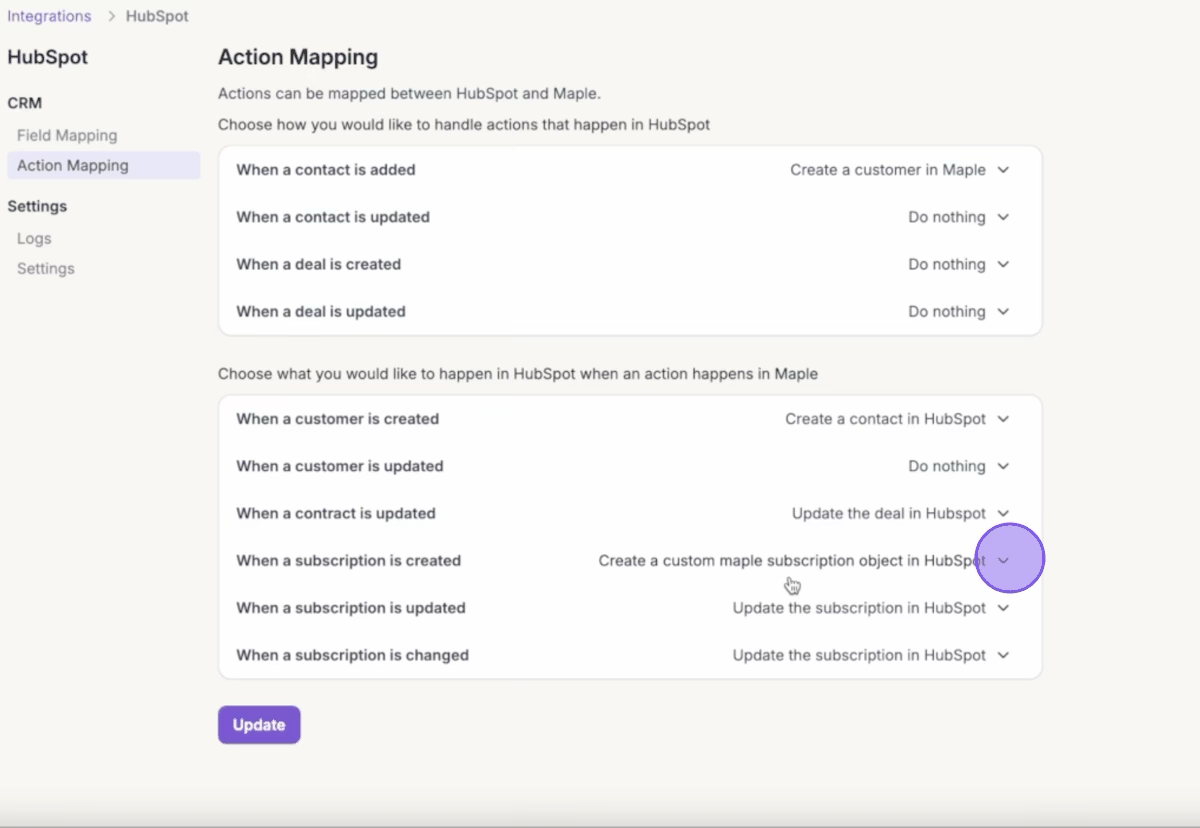
Once configured, Maple can push subscriptions details, update changes to subscriptions, and push invoices to Hubspot.
Look for the Maple Subscriptions and Maple Invoices tabs under the CRM tab in left navigation bar in Hubspot.