
Customer Portal
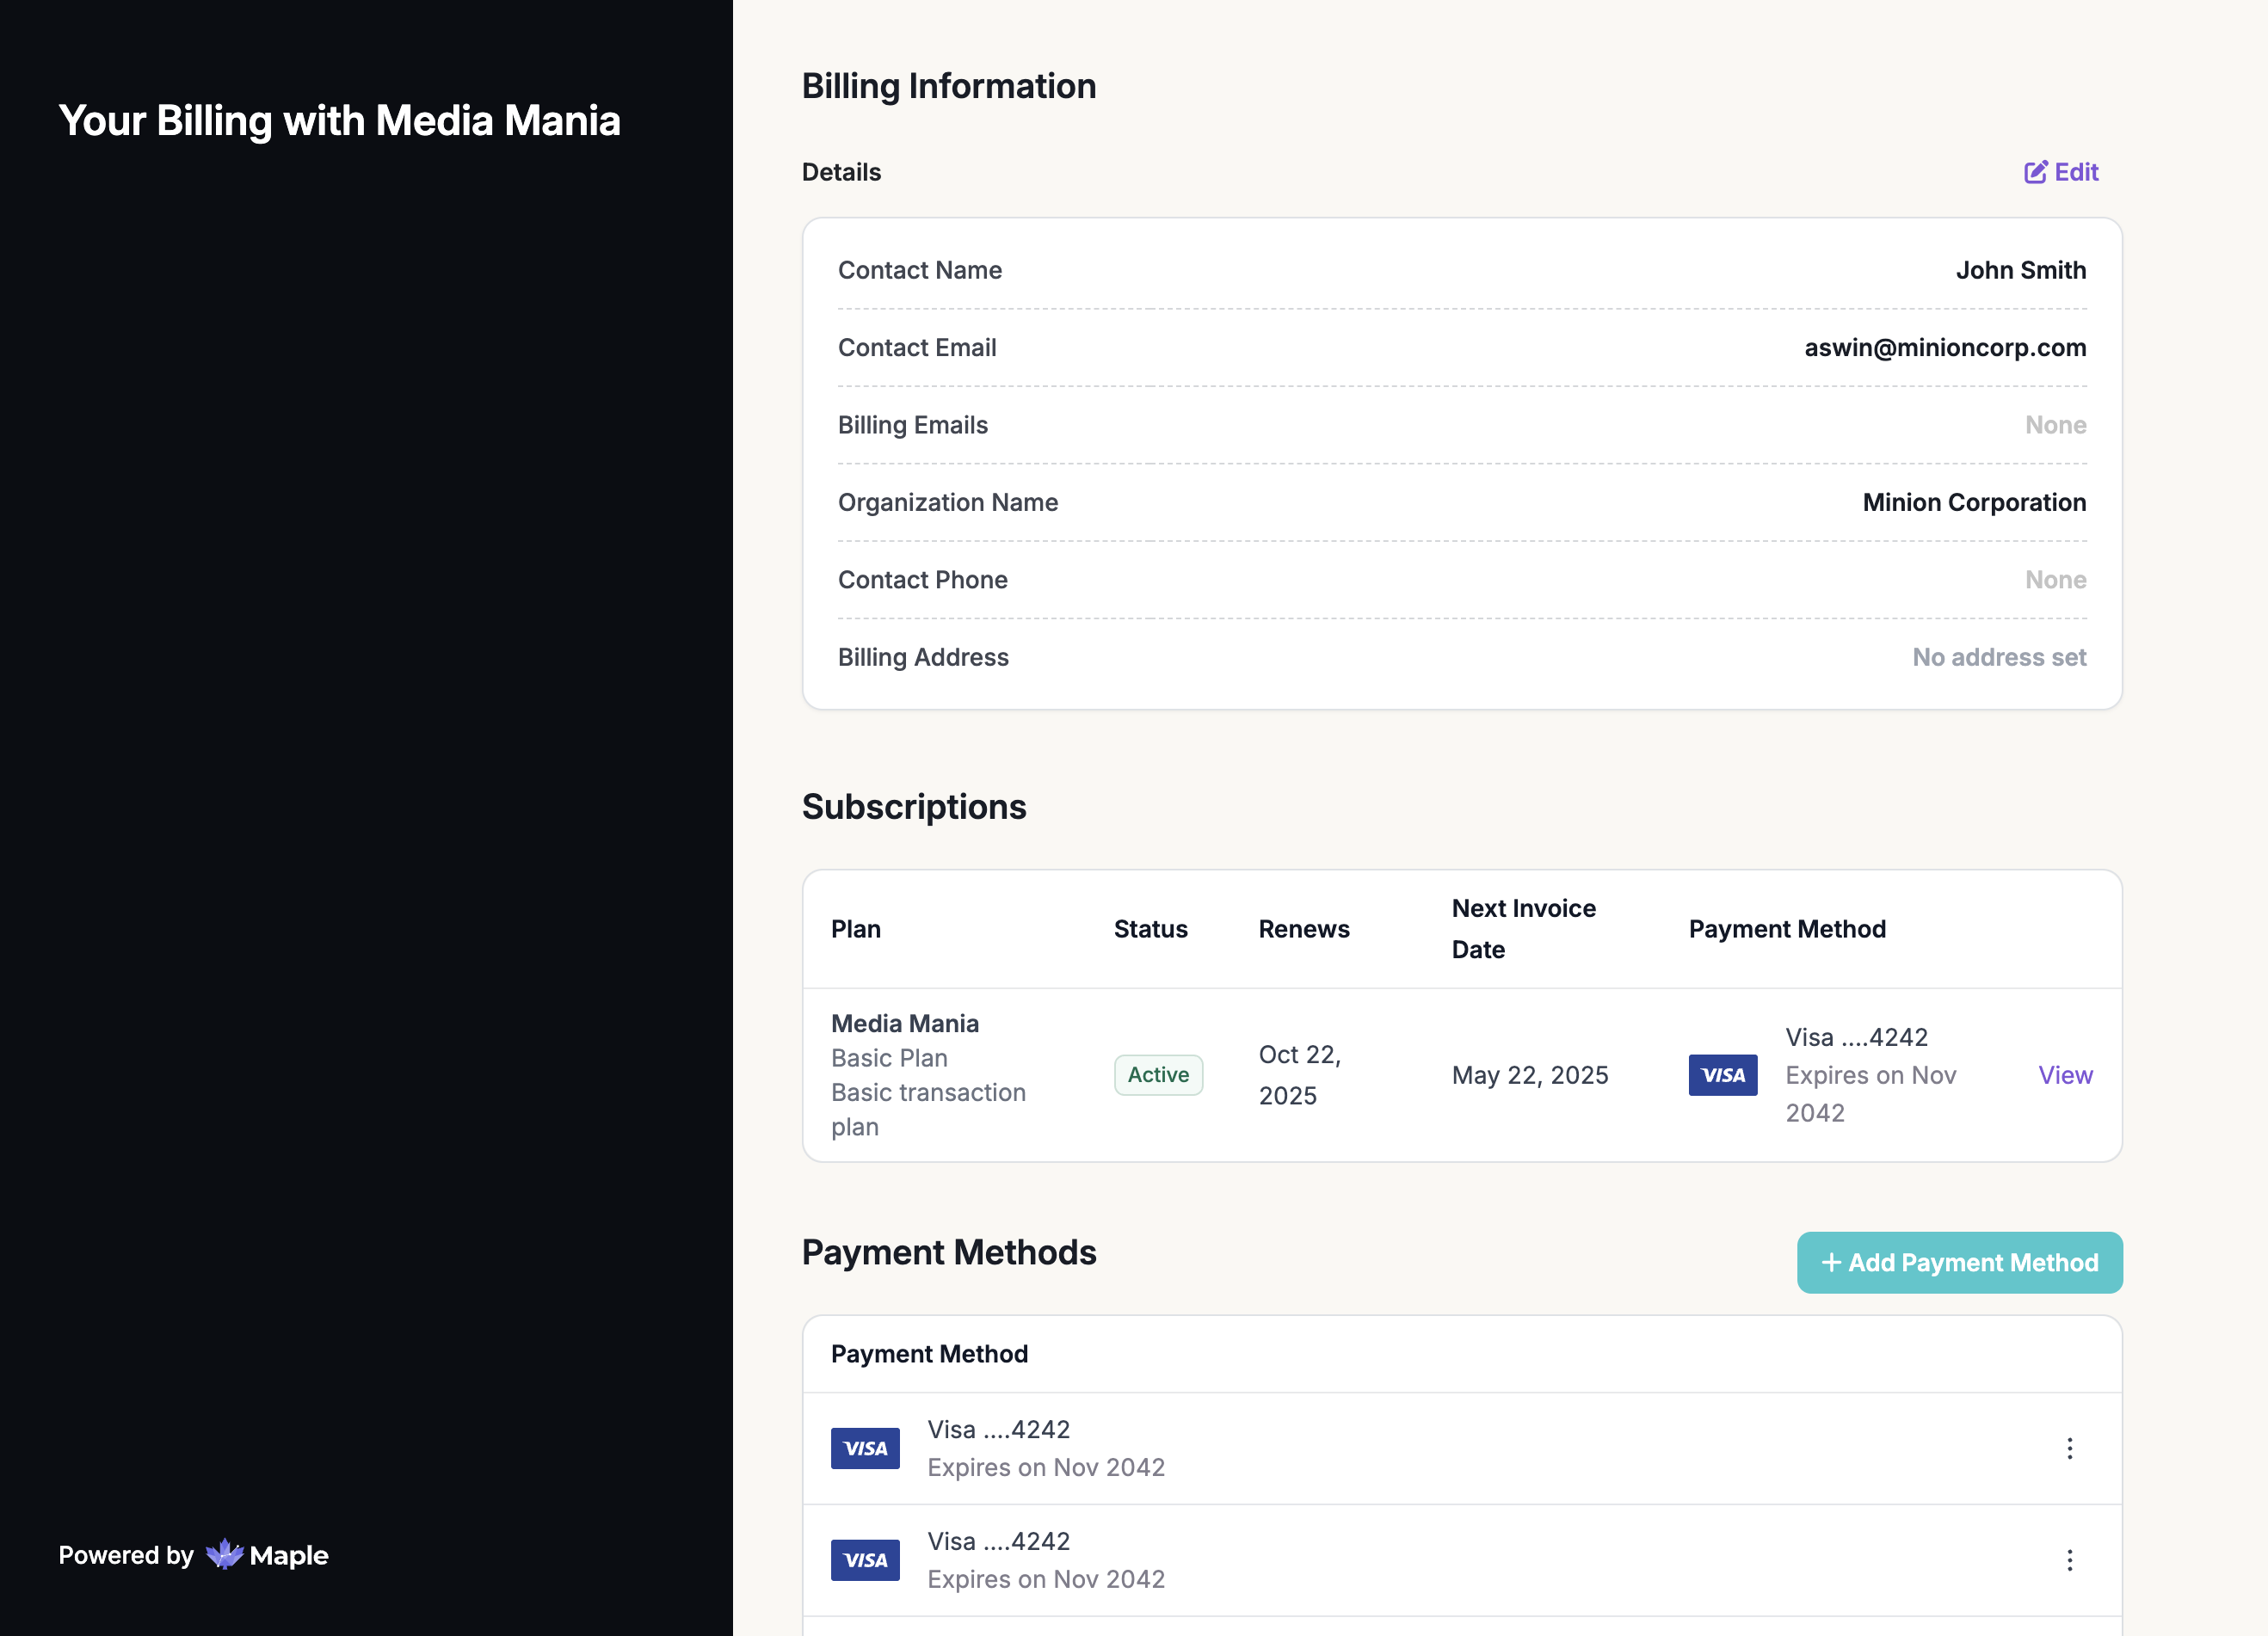
Maple provides a hosted self-service interface that allows your customers to securely manage their billing-related information, such as invoices, payments, payment methods, and subscription details (eg usage).
It provides transparency, convenience, and control for customers while reducing support overhead for your business.
The Customer Portal can be enabled and configured via the web application or dynamically through the Customer Portal API. You can also customize the messaging, the visible details, and branding of the customer portal.
Enabling the Customer Portal
To enable the customer portal,
go to Settings > Customer Portal
turn on the Enable Customer Portal toggle
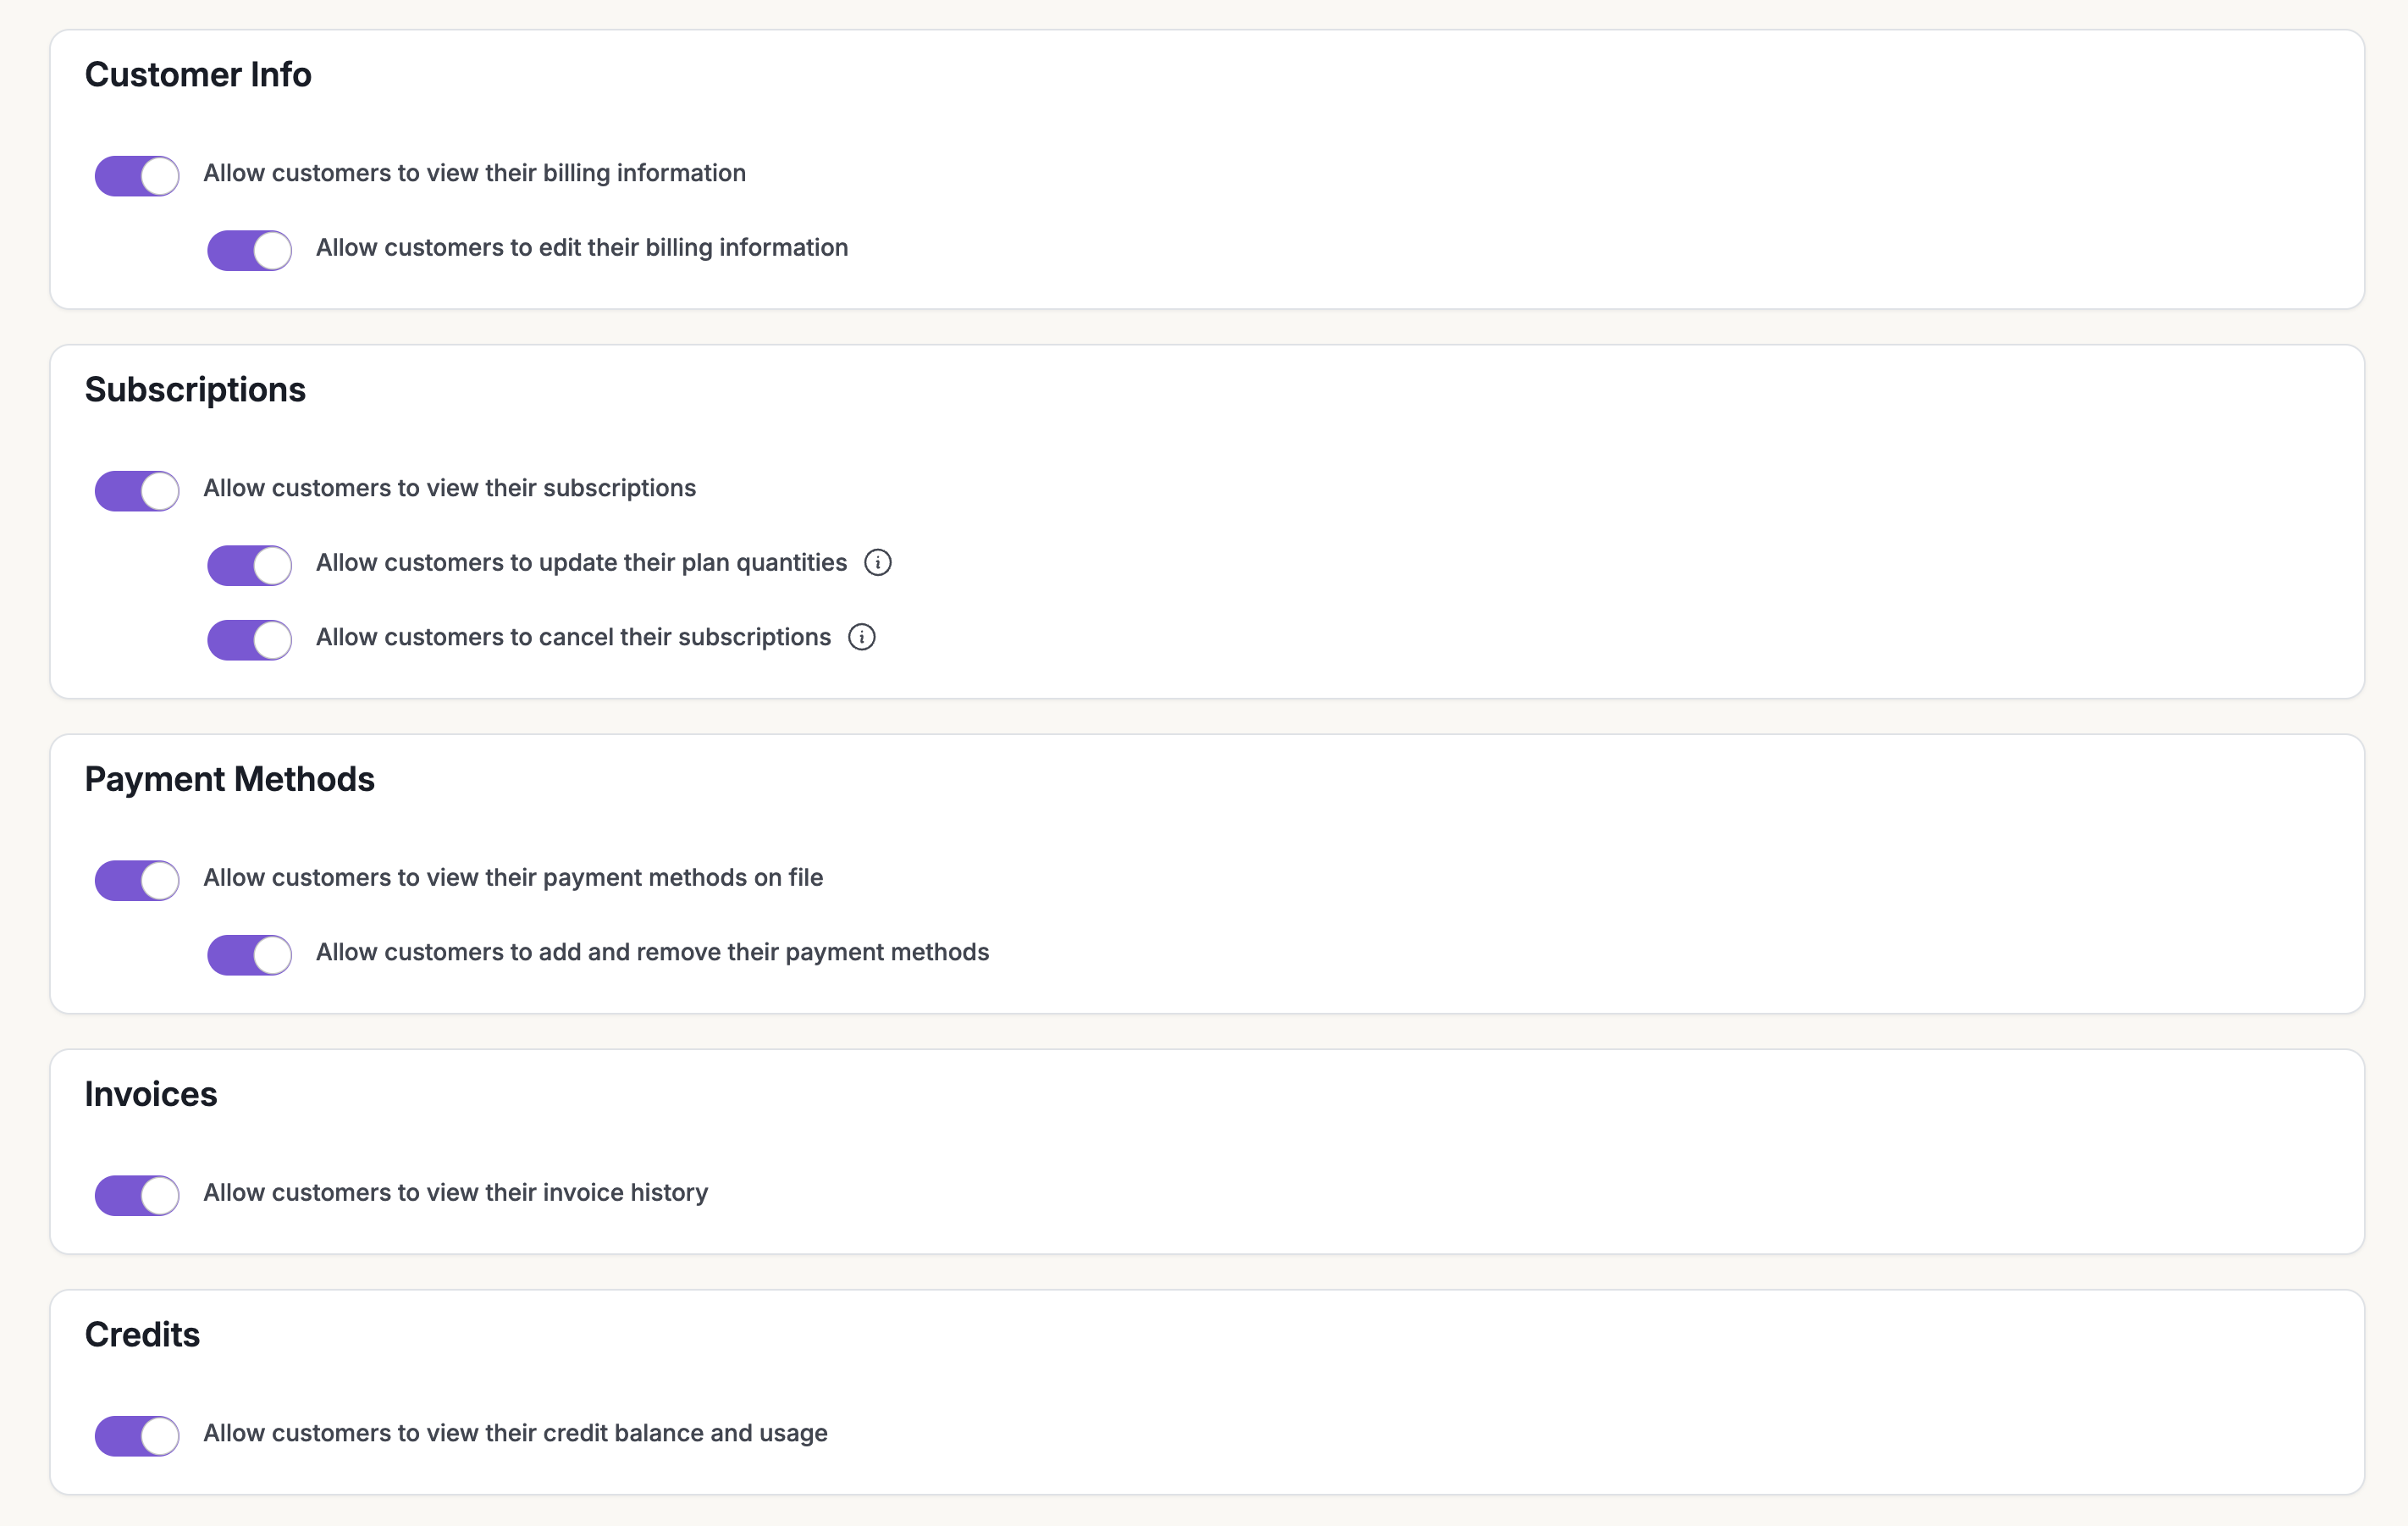
The customer portal can be configured to display the following customer information.
Customer's Billing Information
Subscriptions
Payment Methods
Invoices
Credits
You can also choose allow customers to modify this information or see it in a read-only format.
Displaying Subscription Details in the Portal
To allow your customers to view their own subscriptions
Go to Settings > Customer Portal and ensure the “Enable Customer Portal” is turned on
Go to the Subscriptions section on the page
Enable Allow customers to view their subscriptions to display the subscription details
Allowing Subscription Cancellation from the Portal
To allow your customers to cancel their own subscriptions
Go to the Subscriptions section on the page
Enable Allow customers to cancel their subscriptions to allow subscription cancellation from the customer portal
How Cancellations Work
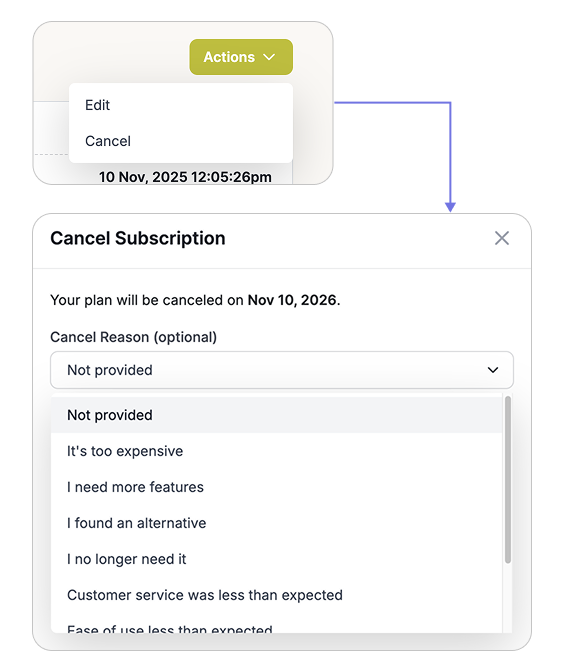
To cancel a subscription, a customer will need to:
Go to the customer portal
Navigate to the subscription they wish to cancel
Select Actions > Cancel
Provide a reason for the cancellation
Confirm the cancellation
The subscription will be cancelled at the end of the subscription term.
Allowing Subscription Updates from the Portal
To allow your customers to update their own subscriptions
Go to the Subscriptions section on the page
Enable Allow customers to update their plan quantities to allow customers to self-manage their subscription quantities, such as increasing or decreasing seat or license counts.
Only license-based or seat-based subscriptions can be updated through the portal. Other types of subscriptions must be managed by an admin via the dashboard.
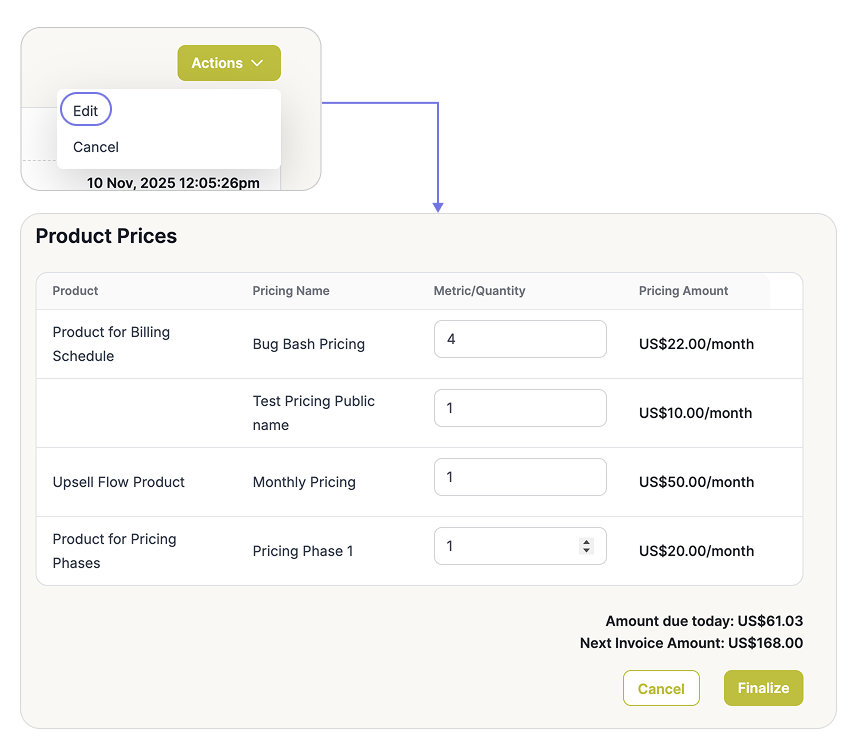
How Updates Work
To update a subscription, the customer will need to:
Log in to the customer portal
Locate the subscription they want to modify
Click Actions > Edit
Adjust the number of seats or licenses
Review and confirm the changes
How Upgrades Work
When a customer upgrades their subscription by adding more seats or licenses:
The change is applied immediately
The customer is charged a prorated amount for the additional seats for the remainder of the billing period
On their next invoice, the new seat/license total will be fully reflected in the charges
This immediate effect ensures customers gain access to the new capacity right away, supporting scalability and flexibility.
How Downgrades Work
When a customer downgrades their subscription by reducing seats or licenses:
The change takes effect at the start of the next billing cycle
There is no immediate proration or refund
On the next invoice, the updated seat/license count will be billed accordingly
This approach ensures billing consistency and avoids mid-cycle adjustments that can complicate reporting or cause confusion.